Installing Home Assistant on the Raspberry Pi 5
Creating the SD card with the Raspberry Pi Imager is well described on the Home Assistant website.
SSH Access
After the initial configuration of Home Assistant, we still need to make some settings via the command line. For this, we need SSH access. Fortunately, there is the "Advanced SSH & Web Terminal" add-on:

To ensure the connection from a Windows computer using the SSH command works, the configuration must include the setting
compatibility_mode: true.
This time, I do not want to authenticate using a username/password but rather with an RSA key. To do this, open a PowerShell or command-line window and enter the following command:
ssh-keygen -t rsa -b 4096 -C "ha"
Instead of "ha," any label can be used to identify the key. I used "ha" for Home Assistant. After that, you will be asked for the filename under which the key should be saved.
If you enter, for example, "ha.key," two files will be created:
ha.key contains the private key
ha.key.pub contains the public key
Now open the ha.key.pub file with Notepad, for example, and copy the contents to the clipboard. Then paste it into the Home Assistant SSH add-on configuration as the parameter authorized_keys.
The configuration then looks as follows:

To connect from Windows to Home Assistant via SSH, enter the following command on the command line:
ssh -i homeassistant.key hassio@homeassistant.local
The file homeassistant.key is the file with the previously created private key, hassio is the default username from the add-on configuration, and homeassistant.local is the default hostname of the Home Assistant installation.
Enabling UART
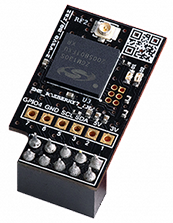
UART stands for Universal Asynchronous Receiver / Transmitter and defines a protocol or chip used for serial communication between the Raspberry Pi and the RaZberry Z-Wave module.

To ensure the RaZberry 7 Pro module functions properly, UART must first be enabled on the Raspberry Pi 5.
This configuration is done in the config.txt file. In the latest Home Assistant OS for the Raspberry Pi 5, this file is located on a hidden partition of the SD card. Instructions stating that config.txt can be edited using an SD card reader on a Windows PC are therefore no longer valid.
So, we connect to the Raspberry Pi via SSH and create a directory where we then mount the corresponding partition:
        mkdir -p /mnt/boot

        mount -t vfat /dev/mmcblk0p1 /mnt/boot
We can then edit the config.txt file with any editor, such as "nano":
nano /mnt/boot/config.txt
At the very bottom, after the line [all], we add the following line:
dtoverlay=uart0-pi5
Disabling Bluetooth?
Contrary to some instructions found on the internet, Bluetooth does not need to be disabled on the Raspberry Pi 5 to use the RaZberry 7 Z-Wave module! However, if Bluetooth is not explicitly needed, I still recommend disabling it completely to avoid potential interference. The same applies to WiFi if the Raspberry Pi is always connected to the LAN via Ethernet cable.
Bluetooth and WiFi can also be disabled in the config.txt file. To do this, add the following lines at the very bottom:
        dtoverlay=disable-bt

        dtoverlay=disable-wifi
Then save the file (Ctrl-X, Y, and Enter) and restart the Raspberry Pi by unplugging the power.
Z-Wave Integration
In Home Assistant, navigate to Settings → Devices & Services, click on ADD INTEGRATION, and search for Z-Wave.
Once the integration is added and configured, the RaZberry7 Pro should appear as the device "Z-Wave Shield." If multiple TTY USB devices are available during setup, the correct one to choose is: /dev/ttyAMA0


 English